RGBA Tutorial and Usage Tips

As we know RGB means combination of red, green and blue. This combination is weel known to us but it produces color flat, simple and bit boring also. But the new elemant in RGBA 'A'  indicates alpha which is opacity in color or you can say transparency. Means now we can add amount of transparency of color and allow how much background color should appear. So adding lot more via CSS3 to your website color and graphics experience, this can help a lot in order to give users a dynamic experience.

Now lots of reader think that we have oacity already which works well every time like this


h1 {
color: rgb(0, 0, 0);
background-color: rgb(255, 255, 255);
opacity: 0.5;
}

But now the best thing of RGBA which makes itself differ than opacity is that, you can set transparency to a single element while opacity gives transparency to every element. Now look this example having RGBA for background color only (not for text color as that of opacity do).


h1 {
color: rgb(0, 0, 0); 
background-color: rgba(255, 255, 255, 0.5); 
}

As you see only transparency comes in background color but not in font color. Now alpha here is '0.5'. It can have value up to 1, where one is having no transparency and 0.1 has most. (as same as opacity concept). But we only show you background color opacity, just look little bit more about it in below picture.


h1 {
color: rgba(0, 0, 0, 0.5);
background-color: rgb(255, 255, 255);
}


Here the special thing is transparency in font color, but background color is showing plane white having no opacity effect of 0.5 which can be explained as 50% transparent But the best part which actually makes web pages dynamic is coming now but simple as we see above. So have a fast look.


div {
border: 10px solid rgba(255, 255, 255, 0.3);
background-color: rgb(255, 255, 255);
}

So this is transparency in Border color while opacity doesn't produce this effect greatly to use in website as compared to RGBA. The really great thing about RGBA colour is that it gives us the ability to create far more graphically rich designs without the need to use images. Not only does that make for faster and lighter pages, but sites which are easier and quicker to build and maintain. CSS values can also be changed in response to user interaction or even manipulated with JavaScript in a way that’s just not so easy using images. Now lets come to the last example , which is hovering example that is similar to opacity hovering but without using imges.


div { 
color: rgba(255, 255, 255, 0.8); 
background-color: rgba(142, 213, 87, 0.3); 
}

div:hover { 
color: rgba(255, 255, 255, 1); 
background-color: rgba(142, 213, 87, 0.6);
}

So hovering effect example as well as css are written above. That’s a brief insight into RGBA colour, what it’s good for and how it can be used whilst providing support for older browsers. With the current lack of support in Internet Explorer, it’s probably not a technique that commercial designs will want to heavily rely on right away – simply because of the overhead of needing to think about fallback all the time.
[ Read More ]

PHP for E-mail Sending

E-Mail is now a pretty popular way to get your users always updated about status that what is happening on your site or blog. In this PHP can help you a lot. It is very easy to use this function once your script is ready. The php function can also send mails automatically to user on adding any update to your website or blog. For this mailing process php has added a function mail() to send mail via script or you an say via web server. The syntax of this function is

mail(to, subject, message, headers, parameters)

So it is as simple as using echo in your document. The brief information about mail() functions you can read below

  •  To - Specifies the receiver / receivers of the email
  • SubjectSpecifies the subject of the email. Note - This parameter cannot contain any newline characters
  • Message Defines the message to be sent. Each line should be separated with a LF (\n). Lines should not exceed 70 characters
  • Headers Specifies additional headers, like From, Cc, and Bcc. The additional headers should be separated with a CRLF (\r\n)
  • Parameters Specifies an additional parameter to the sendmail program
Please note again -For the mail functions to be available, PHP requires an installed and working email system. The program to be used is defined by the configuration settings in the php.ini file.
Now its time for a good example to explain this very easily and clearly, So have a look

$to = "someone@example.com"; 
$subject = "Test mail"; 
$message = "This is a simple email message."; 
$from = "someonelse@example.com"; 
$headers = "From :" . $from; 
mail($to,$subject,$message,$headers); 
echo "Mail Sent.";

Now lets see how to use if and else for better mailing and to stop unwanted email sending every time on opening a page. See how we can make it

if (isset($_REQUEST['email']))
//if "email" is filled out, send email
  {
  //sending email
  $email = $_REQUEST['email'] ;
  $subject = $_REQUEST['subject'] ;
  $message = $_REQUEST['message'] ;
  mail("someone@example.com", $subject,
  $message, "From:" . $email);
  echo "Thank you for using our mail form";
  }
else
//if "email" is not filled out, display the form
  {
  echo "<form method='post' action='mailform.php'>
  Email: <input name='email' type='text' /><br />
  Subject: <input name='subject' type='text' /><br />
  Message:<br />
  <textarea name='message' rows='15' cols='40'>
  </textarea><br />
  <input type='submit' />
  </form>";
  }

Here email will be sent only the form is filled, if form is not filled than the form will appear again to user. So when the submit button is clicked, page reloads and mail will be sent to given address.


Now , what more is left in post? Well, the last thing left is validating spams which is one of major problems. So we can also deal with spams. Just look this awesome code -


function spamcheck($field)
  {
  //filter_var() sanitizes the e-mail
  //address using FILTER_SANITIZE_EMAIL
  $field=filter_var($field, FILTER_SANITIZE_EMAIL);

  //filter_var() validates the e-mail
  //address using FILTER_VALIDATE_EMAIL
  if(filter_var($field, FILTER_VALIDATE_EMAIL))
    {
    return TRUE;
    }
  else
    {
    return FALSE;
    }
  }

if (isset($_REQUEST['email']))
  {//if "email" is filled out, proceed

  //check if the email address is invalid
  $mailcheck = spamcheck($_REQUEST['email']);
  if ($mailcheck==FALSE)
    {
    echo "Invalid input";
    }
  else
    {//send email
    $email = $_REQUEST['email'] ;
    $subject = $_REQUEST['subject'] ;
    $message = $_REQUEST['message'] ;
    mail("someone@example.com", "Subject: $subject",
    $message, "From: $email" );
    echo "Thank you for using our mail form";
    }
  }
else
  {//if "email" is not filled out, display the form
  echo "<form method='post' action='mailform.php'>
  Email: <input name='email' type='text' /><br />
  Subject: <input name='subject' type='text' /><br />
  Message:<br />
  <textarea name='message' rows='15' cols='40'>
  </textarea><br />
  <input type='submit' />
  </form>";
  }


Now here we use to new tags in above function 'spamcheck' .

  • The FILTER_SANITIZE_EMAIL filter removes all illegal e-mail characters from a string
  • The FILTER_VALIDATE_EMAIL filter validates value as an e-mail address
So here our this post ends. Leave comments for further information.
[ Read More ]

Full Guideline about If and Else Function

PHP If Else
This function is just to clarify in php that if something exist then what to show and if its not exist at all then what should be there for user to see. If and Else functions are most commonly used php element next to print or include. This function can work both positively and negatively depending upon your choice hoe to use it.

It generally used where a condition is set for server depending on user data or your data. Most easiest example to explain this is given below -

$date = date("D");
if ($date == "Fri")
 { echo "Have a nice weekend!"; }
else 
 { echo "Have a nice day!"; }

Now in above Example $date is getting the present day and if today is Friday then it executes command "Have a nice weekend!" otherwise it executes "Have a nice day!"if it is any other day. It is positive conditon for if and else.

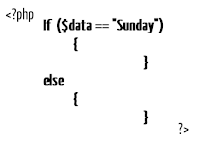
Now You can use it in negativel condition also in your document. So see below example also


$date = date("D");
if ($date !== "Sunday")
 { echo "Its not Sunday today!"; }
else 
 { echo "Have a nice Sunday!"; }


Here (' !== ') sign in condition is representing negative condition for Sunday. Means on setting !== "Sunday" , you are telling that if condition is set if its not Sunday.

In other cases like Security Case or giving access to some of your closed members than you can set password or username to get acess to any page. Example is given below -

<form method="post"><input name="pass" type="password" /><input type="Submit" /></form>
<?php
$pass = $_POST['pass'];
if ($pass == "abc")
 {
      print 'Logged Successfully';
 }
else
 {
      print 'Error in Log in. Wrong Password Entered.';
 }
?>


So in above example if user enters pass "abc" only the he/she will get access to your page whose link can be added in print of If here. In same way you can ask for username also. But this protection can be used up to some cases or less serious cases.

Last function to discuss here is elseif function. Else if mean that in case that If is not valid for a case than to have a second case with you, you can us elseif. It is also as simple as if itself. So lookout at this simple example -

$d=date("D");
if ($d=="Fri")
{
echo "Have a nice weekend!";
}
elseif ($d=="Sun")
{
echo "Have a nice Sunday!";
}
else
{
echo "Have a nice day!";
}


Here you can see that if its Friday then message comes "Have a nice weekend!", but else if its Sunday then message comes "Have a nice Sunday!". But if its neither Friday nor Sunday today then the message comes "Have a nice Day!".

If you have any doubts feel free to comment below.
[ Read More ]

CSS3 Linear Gradient Syntax

The CSS gradient feature was introduced by Webkit for about two years but was rarely used due to incompatibility with most browers. But now with the Firefox 3.6+, which supports gradient, we can style create gradient without having to create an image. This post is usefull for all people especially those who want that there website opens quikly on all slow and dial up connections. So, instead of using photos for background gradients we will make use of of a CSS3 property which is linear gradient .So Look at this Example

In this photo you can see the shades of white, green, purple and blue produced with the help of linear gradient. You can use both rgb and hex colors for this css3 property.


So code used in above picture for purple color is (Google Chrome, Safari)
background: -webkit-gradient(linear, left top, left bottom, from(#A349A4), to(rgb(126,56,126)));

For firefox you have to use
background: -moz-linear-gradient(top, #A349A4, rgb(126,56,126));

For IE Use css
filter: progid:DXImageTransform.Microsoft.gradient(startColorstr='#A349A4', endColorstr='rgb(126,56,126)');

For Opera You can go with this
 background: -o-linear-gradient(top, #A349A4, rgb(126,56,126));

To use in all browsers use a combine css like this
.thisClass {
background: -webkit-gradient(linear, left top, left bottom, from(#A349A4), to(rgb(126,56,126)));  /** Google Chrome , Safari **/
background: -moz-linear-gradient(top, #A349A4, rgb(126,56,126)); /** Firefox **/
 background: -o-linear-gradient(top, #A349A4, rgb(126,56,126)); /** Oper **/
filter: progid:DXImageTransform.Microsoft.gradient(startColorstr='#A349A4', endColorstr='rgb(126,56,126)'); /** IE** /
}
[ Read More ]